Classic Homemade Lasagna Recipe

Introduction

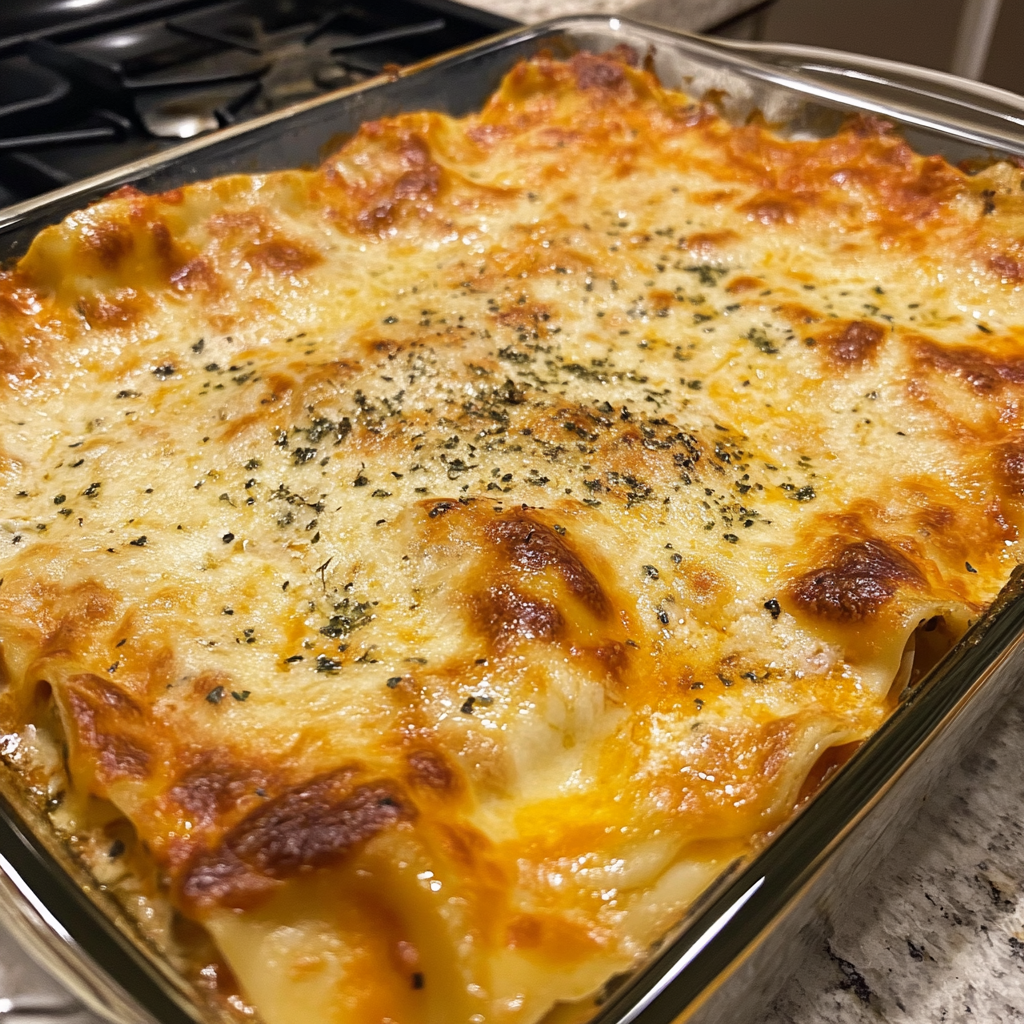
There’s something magical about a bubbling tray of homemade lasagna. It’s the kind of meal that feels like a warm hug — rich layers of meat sauce, velvety béchamel, tender pasta sheets, and gooey melted cheese. Whether you’re preparing it for Sunday dinner, a holiday gathering, or simply meal prepping for the week ahead, lasagna is always a good idea.

This classic lasagna recipe strikes the perfect balance between hearty and wholesome, delicious and doable. And the best part? You can make it ahead, freeze it, or adapt it to your family’s tastes. It’s the kind of recipe every home cook should have in their back pocket — and once you try it, you’ll never go back to store-bought again.


Why This Lasagna Stands Out

  • Deep, rich flavor from a slow-simmered meat sauce
  • Creamy béchamel instead of heavy ricotta for a silky texture
  • Easy to prep ahead or freeze for busy nights
  • Family-approved and freezer-friendly

This is a recipe that feeds a crowd and warms the soul — and it’s easier to make than you think.


Ingredients

For the meat sauce:

  • 2 tablespoons olive oil
  • 1 medium onion, diced
  • 2 cloves garlic, minced
  • 1 pound ground beef
  • ½ pound Italian sausage (optional for extra flavor)
  • 1 teaspoon salt
  • ½ teaspoon black pepper
  • 1 tablespoon tomato paste
  • 1 (28 oz) can crushed tomatoes
  • 1 (15 oz) can tomato sauce
  • 1 teaspoon sugar
  • 1 teaspoon dried oregano
  • ½ teaspoon dried basil
  • ½ teaspoon crushed red pepper flakes (optional)

For the béchamel sauce:

  • 4 tablespoons unsalted butter
  • 4 tablespoons all-purpose flour
  • 3 cups whole milk, warmed
  • Pinch of nutmeg (optional)
  • Salt and pepper to taste

For layering:

  • 9–12 lasagna noodles (regular or no-boil)
  • 2 cups shredded mozzarella
  • ½ cup grated Parmesan
  • Fresh basil or parsley for garnish (optional)

Step-by-Step Instructions

1. Make the Meat Sauce

In a large skillet or saucepan, heat the olive oil over medium heat. Add the chopped onions and cook until softened (about 5 minutes). Add garlic and cook for another 30 seconds.

Add the ground beef and sausage. Break it up with a spoon and cook until browned. Drain excess fat if needed.

Stir in tomato paste and cook for 1 minute. Then add crushed tomatoes, tomato sauce, sugar, and seasonings. Simmer uncovered for 25–30 minutes, stirring occasionally, until thickened and flavorful. Set aside.


2. Prepare the Béchamel Sauce

In a separate saucepan, melt butter over medium heat. Whisk in flour to make a roux, cooking for about 1 minute until bubbly (but not browned). Gradually whisk in warm milk, continuing to stir to prevent lumps.

Cook until the sauce thickens (about 5–7 minutes). Add a pinch of nutmeg, salt, and pepper to taste. Remove from heat and cover to keep warm.


3. Cook the Noodles

If using regular lasagna noodles, cook them in salted boiling water according to package directions. Drain and lay them on a baking sheet, separating with parchment paper to prevent sticking.

If using no-boil noodles, skip this step.


4. Assemble the Lasagna

Preheat oven to 375°F (190°C).

In a 9×13-inch baking dish, spread a thin layer of meat sauce. Then follow this order:

  1. Layer of noodles
  2. Spoonfuls of béchamel sauce
  3. Generous spoonfuls of meat sauce
  4. Sprinkle of mozzarella
  5. Repeat (3–4 layers)

Finish with a final layer of noodles, meat sauce, béchamel, mozzarella, and Parmesan on top.


5. Bake the Lasagna

Cover the dish with foil (lightly oiled so it doesn’t stick to the cheese) and bake for 25 minutes. Remove foil and bake uncovered for another 20–25 minutes, until golden and bubbly.

Let it rest for at least 15 minutes before slicing. This allows the layers to set beautifully.


Pro Tips & Variations

Use béchamel instead of ricotta
While many American-style lasagnas use ricotta cheese, this version with béchamel creates a smoother, silkier bite — just like traditional Italian lasagna.

Mix up your meats
Use a mix of ground beef and Italian sausage for depth. Or try ground turkey for a lighter version.

Vegetarian option
Skip the meat and add layers of sautéed mushrooms, spinach, or zucchini instead.

Make ahead
Assemble the lasagna a day in advance and store in the fridge. Add 10 extra minutes to the baking time.

Freezer-friendly
Freeze the assembled lasagna (unbaked) tightly wrapped in foil for up to 3 months. Bake straight from frozen at 375°F for about 1 hour, covered, then uncover for 20 minutes.


Serving Suggestions

  • Serve with a simple green salad and balsamic vinaigrette
  • Add a side of garlic bread or crusty ciabatta
  • Pair with a glass of red wine (like Chianti or Merlot)
  • Finish with a scoop of vanilla gelato or a piece of tiramisu

Frequently Asked Questions

Can I use jarred sauce instead of making my own?
Yes, in a pinch you can use store-bought marinara. But the homemade meat sauce really elevates the flavor.

Is béchamel hard to make?
Not at all — it’s just butter, flour, and milk. Take your time stirring and you’ll nail it.

How long can I store leftovers?
Up to 4 days in the fridge. Reheat in the oven or microwave until warm.


Conclusion

This classic homemade lasagna is a comfort food essential. Rich, layered, and deeply satisfying, it’s the kind of recipe you’ll come back to again and again. Whether you’re feeding a crowd or prepping meals for the week, this lasagna delivers with love — and leftovers that taste just as good the next day.

Leave a Comment

Garlic Butter Baked Salmon Recipe

Why You’ll Love This Recipe

This garlic butter baked salmon recipe is the kind of dish that delivers restaurant-quality taste with minimal effort. It’s perfect for busy weeknights, elegant enough for dinner guests, and incredibly healthy. Loaded with omega-3 fatty acids and protein, this salmon is baked to perfection in a luscious garlic herb butter sauce that enhances its natural flavors without overpowering them.


Key Benefits

  • Quick & Easy: Prep in 10 minutes, bake in 15.
  • Healthy Choice: Rich in heart-healthy fats, low carb, and high protein.
  • Minimal Cleanup: All done in one baking dish—no stovetop mess.
  • Family-Friendly: Loved by adults and kids alike.

Ingredients

For the salmon:

  • 4 salmon fillets (about 6 oz each, skin-on or off as you prefer)
  • Salt and freshly ground black pepper, to taste
  • 1 tablespoon olive oil (for brushing)

For the garlic butter sauce:

  • 1/2 cup (1 stick) unsalted butter, melted
  • 4 cloves garlic, finely minced
  • 2 tablespoons lemon juice (fresh is best)
  • 1 teaspoon lemon zest
  • 1 tablespoon fresh parsley, chopped
  • 1 teaspoon fresh dill, chopped (optional but recommended)
  • 1/2 teaspoon crushed red pepper flakes (optional)
  • Lemon slices, for garnish

Instructions

1. Preheat and prep:

Preheat your oven to 375°F (190°C). Line a baking dish with foil or parchment paper for easy cleanup. Lightly brush it with olive oil or nonstick spray.

2. Prepare the garlic butter sauce:

In a small bowl, combine the melted butter, minced garlic, lemon juice, lemon zest, parsley, dill, and red pepper flakes. Stir well and set aside.

3. Season the salmon:

Pat salmon fillets dry with a paper towel. Place them skin-side down in the prepared baking dish. Sprinkle salt and pepper on top and brush lightly with olive oil.

4. Add the sauce:

Spoon the garlic butter mixture generously over each fillet, making sure the garlic and herbs are evenly distributed. Place lemon slices on top of the salmon or alongside in the dish.

5. Bake:

Place the baking dish in the oven and bake for 12–15 minutes, depending on the thickness of your fillets. Salmon should be opaque and flake easily with a fork when done.

6. Broil (optional):

For a golden top, broil on high for 1–2 minutes after baking—just keep an eye on it so it doesn’t burn.

7. Serve:

Serve immediately, garnished with more fresh herbs and lemon wedges if desired.


Pro Tips & Variations

  • Use Fresh Salmon: If possible, opt for wild-caught fresh salmon for the best flavor and texture.
  • Make it a Sheet Pan Meal: Add asparagus, broccoli, or sliced zucchini to the baking dish to cook alongside the salmon.
  • Add Parmesan: Sprinkle a tablespoon of freshly grated Parmesan over each fillet before baking for an extra savory kick.
  • Herb Swap: Try fresh thyme or chives instead of parsley and dill.
  • Make it spicy: Add extra red pepper flakes or a dash of cayenne if you like heat.

Serving Suggestions

  • Serve with steamed rice, garlic mashed potatoes, or a side of buttered noodles.
  • Pair with a crisp white wine like Sauvignon Blanc or Pinot Grigio.
  • A light green salad with vinaigrette complements the richness perfectly.

FAQs

Can I use frozen salmon?
Yes, just make sure to thaw it completely and pat it dry before cooking.

How do I store leftovers?
Store in an airtight container in the refrigerator for up to 3 days. Reheat gently in the oven or microwave.

Can I grill this instead?
Absolutely! Wrap the fillets in foil with the sauce and grill for 10–12 minutes.

What if I don’t have fresh herbs?
You can use dried herbs—just use one-third the amount (e.g., 1 tsp dried parsley instead of 1 tbsp fresh).


Conclusion

This garlic butter baked salmon recipe is a weeknight winner and a special occasion stunner all in one. It’s the perfect balance of simplicity and flavor, and once you try it, it’s guaranteed to become a go-to in your recipe rotation.

Leave a Comment

Creamy Garlic Chicken Skillet

If you’re like most home cooks, there are weeknights when time is short, energy is low, and everyone’s hungry. That’s where the Creamy Garlic Chicken Skillet shines. It’s everything a dinner should be: quick, comforting, full of flavor, and made with ingredients you probably already have. This dish isn’t just a timesaver — it’s a dinnertime hero. Whether you’re feeding your family or hosting a last-minute guest, this one-pan recipe delivers with elegance and ease.

In this article, we’ll walk you through every step — from ingredient prep to plating — and include expert tips, simple swaps, and serving suggestions to elevate this humble skillet into a signature dish.


Why You’ll Love This Recipe

This creamy garlic chicken skillet is a masterclass in efficiency and flavor. You’ll only need one pan, which means cleanup is a breeze. The sauce is luscious and infused with garlic, while the chicken stays juicy and tender. It’s the kind of dish that feels fancy but fits effortlessly into your busiest weeknight.

What makes this recipe even better?

  • 15-minute cook time
  • Simple pantry ingredients
  • Customizable for different diets
  • Family-friendly flavor profile

Let’s dive into the recipe.


Ingredients You’ll Need

One of the best things about this recipe is its simplicity. Here’s what you’ll need:

  • 2 boneless, skinless chicken breasts
  • Salt and black pepper, to taste
  • 2 tablespoons olive oil
  • 3–4 cloves garlic, finely minced
  • ½ cup chicken broth
  • ½ cup heavy cream
  • ¼ cup grated Parmesan (optional)
  • 1 teaspoon Italian seasoning (or dried thyme/oregano)
  • Chopped fresh parsley for garnish

Step-by-Step Instructions

1. Prepare the Chicken
Slice the chicken breasts in half horizontally to create four thin cutlets. This ensures quicker cooking and more even browning. Pat them dry with a paper towel and season both sides with salt and pepper.

2. Sear the Chicken
Heat olive oil in a large skillet over medium-high heat. Once hot, add the chicken cutlets and sear for about 4 minutes per side, or until golden brown and cooked through. Remove from the pan and set aside.

3. Make the Garlic Cream Sauce
Reduce the heat to medium and add a splash of oil if needed. Toss in the minced garlic and sauté for 30 seconds until fragrant — don’t let it burn. Pour in the chicken broth to deglaze the pan, scraping up any browned bits.

Let it simmer for 2 minutes, then add the heavy cream and Italian seasoning. Simmer for another 3–4 minutes, stirring occasionally, until the sauce thickens slightly. If using, stir in Parmesan for extra richness.

4. Combine and Finish
Return the chicken to the pan, spooning sauce over the top. Simmer for 2 more minutes to meld the flavors. Garnish with chopped parsley before serving.


Make It Your Own: Variations and Substitutions

This recipe is flexible — feel free to make it your own:

  • Low-carb/Keto: Skip the Parmesan and use unsweetened almond milk instead of cream. Serve with roasted veggies or cauliflower mash.
  • Dairy-free: Replace cream with canned coconut milk and omit the cheese.
  • Add-ins: Toss in spinach, sun-dried tomatoes, or mushrooms for extra depth.
  • Protein switch: Use boneless thighs, turkey cutlets, or even shrimp.

Serving Suggestions

Here’s how to turn this skillet into a complete meal:

  • Pasta: Spoon the chicken and sauce over linguine or fettuccine.
  • Rice or quinoa: A hearty grain soaks up the creamy sauce beautifully.
  • Mashed potatoes: Classic comfort on a plate.
  • Crusty bread: Perfect for mopping up every last drop of garlic cream.

Pair it with a simple green salad and a glass of crisp white wine like Chardonnay or Pinot Grigio, and dinner is done.


Meal Prep and Storage Tips

This dish is great for next-day lunches or meal prepping:

  • Storage: Store leftovers in an airtight container in the fridge for up to 3 days.
  • Reheating: Reheat gently on the stovetop over low heat, adding a splash of broth or water to loosen the sauce.
  • Freezing: It’s best fresh, but you can freeze it (minus the cream) and add dairy after reheating.

Expert Tips for Success

  • Don’t overcrowd the pan: Give the chicken space so it sears properly.
  • Watch your garlic: Garlic cooks quickly — burnt garlic will turn bitter and ruin the sauce.
  • Use room-temperature cream: Cold dairy can curdle when added to hot liquid.
  • Finish with lemon zest: For brightness, add a touch of lemon zest before serving.

Final Thoughts

This Creamy Garlic Chicken Skillet checks all the boxes: fast, easy, and loaded with flavor. It’s exactly the kind of meal that makes weeknights feel less chaotic and a lot more delicious.

Keep it in your rotation, and you’ll always have a reliable, crowd-pleasing dinner ready to go.

Leave a Comment

Tacos

🌮 Easy Homemade Tacos (with Ground Beef or Veggie Option)

Tacos are the kind of meal that make any day feel like a celebration. Crispy or soft, spicy or mild – there’s a taco for everyone. And the best part? You can make them at home with just a few simple, wholesome ingredients.

Whether you love meat or prefer plant-based fillings, this easy taco recipe is a must-try!


🛒 Ingredients

For the Taco Filling (Choose one):

Beef Option:

  • 250g ground beef
  • 1 small onion, finely chopped
  • 1 garlic clove, minced
  • 1 tsp cumin
  • 1 tsp paprika
  • 1/2 tsp chili powder (optional)
  • Salt and pepper to taste

Veggie Option:

  • 1 cup cooked black beans or lentils
  • 1 small zucchini, diced
  • 1/2 red pepper, diced
  • 1/2 tsp cumin + 1/2 tsp smoked paprika
  • Salt and olive oil

For the Toppings:

  • Chopped lettuce
  • Diced tomatoes or salsa
  • Grated cheese or vegan cheese
  • Sliced avocado or guacamole
  • Sour cream or yogurt
  • Fresh coriander (optional)
  • Lime wedges

For the Shells:

  • Soft tortillas or crunchy taco shells (store-bought or homemade)

👩‍🍳 How to Make It

  1. Cook the filling:
    • Heat a pan with a little oil.
    • For beef: cook onion and garlic, then add beef and spices. Stir until fully cooked.
    • For veggie: sauté veggies, then add beans and spices. Cook until tender.
  2. Warm the tortillas or shells in a dry pan or oven.
  3. Assemble your tacos:
    • Add filling to the center of each tortilla.
    • Top with your favorite toppings – keep it simple or load it up!
    • Squeeze a bit of lime on top for extra freshness.

🧡 Why We Love Tacos at Alami

Tacos are quick, family-friendly, and totally flexible. You can mix and match ingredients based on what’s in your fridge. They’re perfect for weeknight dinners, meal preps, or even a taco party!


🌮 Taco Night Tips:

  • Let everyone build their own tacos – it’s fun and mess is welcome!
  • Make it spicy or mild depending on the crowd.
  • Want to go extra healthy? Use lettuce wraps instead of tortillas.

Leave a Comment

Pizza Napoli

🍕 Easy Homemade Pizza Recipe (With Dough & Topping Ideas)

Who doesn’t love pizza? Whether it’s a cozy family dinner or a fun weekend treat, pizza brings people together. And the best part? You don’t need to be a professional chef to make it at home!

Here’s an easy, tried-and-true pizza recipe you can bake in your own oven with fresh, everyday ingredients.


🍞 Homemade Pizza Dough

Ingredients:

  • 2 ½ cups all-purpose flour
  • 1 packet (7g) instant yeast
  • 1 tsp sugar
  • 1 tsp salt
  • 2 tbsp olive oil
  • 1 cup warm water

Instructions:

  1. In a bowl, combine warm water, sugar, and yeast. Let sit for 5–10 mins until bubbly.
  2. Add flour, salt, and olive oil. Mix and knead until smooth (about 5–7 mins).
  3. Cover and let it rise for 1 hour in a warm spot.
  4. Roll it out on a floured surface to your desired thickness.

🍅 Simple Pizza Sauce

Ingredients:

  • 1 cup canned crushed tomatoes
  • 1 garlic clove, minced
  • 1 tbsp olive oil
  • 1 tsp dried oregano
  • Salt and pepper to taste

Instructions: Sauté garlic in olive oil for 30 seconds, add tomatoes and oregano. Simmer for 10 minutes. Done!


🧀 Topping Ideas

Classic Margherita:

  • Tomato sauce
  • Fresh mozzarella
  • Fresh basil leaves
  • Drizzle of olive oil

Veggie Delight:

  • Tomato sauce
  • Mozzarella or vegan cheese
  • Sliced bell peppers, mushrooms, red onion, olives

Mediterranean:

  • White sauce (or tomato)
  • Feta cheese
  • Spinach, black olives, cherry tomatoes
  • Sprinkle of za’atar or oregano

Spicy Chicken:

  • BBQ or tomato sauce
  • Cooked shredded chicken
  • Jalapeños, red onion, mozzarella

🔥 Bake It!

  1. Preheat oven to 220°C (430°F).
  2. Place pizza on a baking sheet or pizza stone.
  3. Bake for 10–15 minutes until golden and bubbly.
  4. Let cool for 5 minutes before slicing. Enjoy!

💡 Tips from Alami:

  • Want a crispier crust? Pre-bake the dough for 5 minutes before adding sauce and toppings.
  • No time for dough? Use pita bread or tortilla wraps for a super quick version.
  • Make it fun: Let everyone in the family create their own mini pizza!

Pizza night just got better with Alami!
Which topping combo are you trying first? Let us know in the comments or share your creation using #AlamiEats 🍕💛

Leave a Comment

Banana Bread

🍌 5 Irresistibly Easy Banana Recipes to Make at Home

Bananas are one of the most beloved fruits in every kitchen – they’re sweet, naturally creamy, and packed with nutrients like potassium and fiber. But what happens when those bananas start to brown on the counter? You turn them into something delicious!
Here at Alami, we’re all about reducing waste and filling your home with comforting smells and cozy flavors.

Here are 5 easy banana recipes you’ll want to make again and again.


1. Classic Banana Bread

Moist, fluffy, and full of banana flavor.

Ingredients:

  • 2 ripe bananas, mashed
  • 2 eggs
  • 1/2 cup sugar or honey
  • 1/3 cup vegetable oil
  • 1 1/2 cups flour
  • 1 tsp baking soda
  • A pinch of salt
  • Optional: chopped walnuts or chocolate chips

Instructions:

  1. Preheat oven to 175°C (350°F).
  2. Mix wet ingredients, then fold in dry ones.
  3. Pour into a greased loaf pan and bake for 45–50 mins.
    Enjoy with your morning coffee!

2. Banana Oat Pancakes

Naturally sweet, gluten-free, and kid-approved.

Ingredients:

  • 1 ripe banana
  • 1 egg
  • 1/2 cup rolled oats
  • 1/4 tsp cinnamon
  • A splash of milk (optional)

Instructions: Blend everything until smooth. Cook like regular pancakes in a non-stick pan for 2–3 mins per side. Top with honey or yogurt!


3. Frozen Banana Bites

Perfect healthy snack or dessert.

Ingredients:

  • Bananas
  • Melted dark chocolate
  • Crushed nuts or coconut flakes

Instructions: Slice bananas, dip in chocolate, coat with toppings, and freeze.
They’re addictive – you’ve been warned.


4. Banana Smoothie

Quick, energizing, and endlessly customizable.

Ingredients:

  • 1 banana
  • 1/2 cup milk or plant-based milk
  • 1 tbsp peanut butter
  • A few ice cubes

Optional Add-ins:
Spinach, chia seeds, or a spoonful of cocoa powder for a chocolatey twist.


5. Banana Muffins

Great for lunchboxes and snacks.

Ingredients:

  • 3 ripe bananas
  • 2 eggs
  • 1/3 cup sugar
  • 1/4 cup melted butter or oil
  • 1 1/2 cups flour
  • 1 tsp baking powder
  • 1/2 tsp cinnamon

Instructions: Mix wet and dry ingredients separately, then combine. Scoop into muffin tins and bake at 180°C (350°F) for 20–25 minutes.


🍌 Why We Love Bananas at Alami

Bananas are not just delicious—they’re versatile, budget-friendly, and naturally sweet, which means you can often reduce added sugars in your recipes. Whether blended, baked, or frozen, they always bring comfort to the table.


Try one of these recipes this week and tag @AlamiBlog with your creation!
Let’s turn those spotted bananas into golden bites of goodness 💛


Leave a Comment